Have you heard of the oil cleansing method? It’s an ancient facial care technique that has found a new audience in today’s natural body care circles. The idea behind oil cleansing is “like dissolves like,” an adage used by chemists about how solvents work. The solvent, in this case liquid cleansing oil, dissolves similar substances, in this case your face oils. Proponents promise that it works great for cleansing without stripping or irritating your skin.
The oil cleaning method uses either a commercial product (several large cosmetic and skin care companies make oil cleansers that retail from $5 to more than $100 an ounce) or a DIY mixture of castor oil and extra virgin olive oil or sunflower oil. To cleanse you mix your desired ration of oils then massage them into your skin for a few minutes (as though you were getting a facial). To remove the oil you saturate a washcloth with steamy hot water, place it on your face, and allow it to cool. You then wipe your face and repeat the hot washcloth drape/wipe several times allowing the steam to penetrate your skin.
Poke around on the internet and you will discover that some people absolutely LOVE the oil cleansing method and some people absolutely HATE it. There’s not much middle ground.
Why I Wanted to Try Oil Cleansing
I love trying new, all-natural body care DIYs, so my interest was piqued when I first learned about the oil cleansing method. I was also on the hunt for a new, non-toxic facial care routine. I had been using an all-natural, vegan facial care line for a few years. It consisted of a foaming facial cleanser with a toner then a SPF lotion during the day or a moisturizing repair serum at night. I was satisfied with the results, but it wasn’t exactly cheap (the whole routine was about $80 every 4 months) and it had a lot of steps for a lazy lady (aka busy woman) like me. Eventually the toner would get stashed in the back of the medicine cabinet, I would forget to buy more serum and I would begin grumbling about how my skin was looking.
I knew I wanted to try the oil cleanse but I had a few concerns to address. First, I needed to simplify the oil cleanse – if I can’t manage toner I doubted that I would sit around for 10 minutes each night with a steamy washcloth on the face. Second, I wanted to make my own product as the commercially available ones contain chemicals and artificial fragrances that I avoid. Third, I wanted to eliminate castor oil and olive oil, if possible. Castor oil, while all natural, is thick and heavy. It can feel sticky on your skin and has a distinct smell that does not appeal to me. Olive oil also troubles me in light of recent studies showing that much of the olive oil available in the US (as much as 69%) has been mixed with colorants and other cheaper oils. When aiming for pure, affordable, natural skin care; I want to be absolutely sure of all the ingredients!
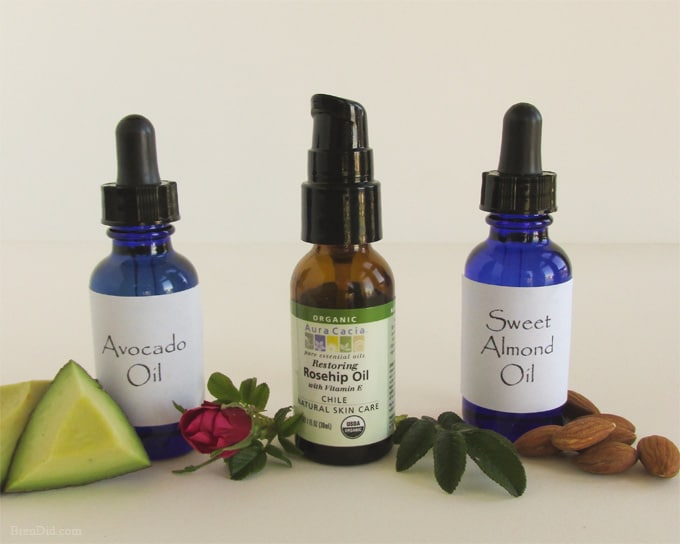
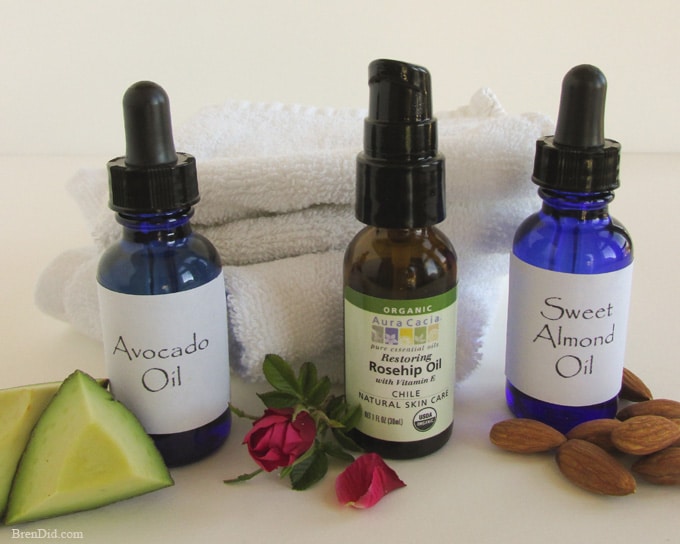
I set out to develop my own oil cleanse, relying on the information I had learned from making my own body lotions, lotion bon bons, and body balms. One of the oils I love for body care is sweet almond oil, it’s made by pressing almonds and is well known for softening and conditioning the skin. It is so mild it is often suggested as a treatment for eczema, psoriasis and inflamed skin. I often use it as a quick moisturizer when I am getting out of the shower. It absorbs quickly and feels very light. You can even use it on your lips.
Another oil I wanted to use was rose hip oil. Rose hip oil (made from pressing the “fruit” of rose bushes) is often recommended for its healing properties; it is extremely high in Vitamin A, Vitamin C, and essential fatty acids (omega-3 and omega-6). It is used as a natural treatment for damaged, weathered, and scared skin and is touted as a therapy for wrinkles, premature aging, and sun damage such as dark spots and hyper-pigmentation. Finally, like sweet almond oil it absorbs into the skin easily. You may have noticed that rose hip oil is a big trend in beauty products right now- Miranda Kerr even started an entire skin care line based on rose hip oil.
Oil Cleansing Directions
Step One – Apply the Oils
- Drop about ½ tsp of sweet almond oil into the palm of your hand then add a few drops of rose hip oil. The brands I use are listed at the end of the post.
- Mix the oils together by rubbing your palms together.
- Spread the oil all over your face (down to your neck if desired) and massage it into your skin. Because they are mild, natural oils you can even use the oil around your eyes and on your eyelids. (If you have never used sweet almond oil or rose hip oil you should do a patch test before using them on your entire face.)
- Let the oil soak in a bit (just a minute or two). I use this time to massage my cuticles with the remaining oil or brush my teeth. You can open your eyes!
Step Two – Remove the Oils
- Saturate a clean cotton wash cloth with hot water (this should not be painfully hot, but as hot as you can tolerate.)
- Wipe your face clean with one side of the wash cloth. If you are wearing makeup you will see it all come off, if you are not wearing makeup you may see the yellowish color of the rose hip oil.
- Turn the washcloth over and wipe your face clean a second time. Concentrate on any problem areas. The added bonus is great exfoliation from the fabric of your washcloth.
Optional Step Three – Skin Treatments
- If your skin is very dry or you want extra rejuvenation you can massage a drop or two of rose hip oil into your skin. I occasionally do this at night. When the weather has been cold or my skin is dry I rub a few drops of organic Argan Oil onto my face before going to bed.
- If you see a blemish developing dab a q-tip in tea tree oil and rub on the area. If you have sensitive skin you should mix it with a bit of Sweet Almond Oil. Tea Tree oil is anti-bacteria and anti-fungal; it can often clear up a blemish overnight. (If you have never used Tea Tree Oil you should do a patch test before using it on your face.)
That’s all! You’re done!
Results
I’ve been on this modified oil cleansing skin care routine for about 3 months. My skin has not looked or felt this good since I was in my early 20s (I’m double that number now)! My pores look smaller, I have not had any break outs, my skin is baby soft and I feel like my hyperpigmentation (thank you pregnancy) is less noticeable.
Bonus Benefits
- My modified oil cleanse is all natural and non-toxic (it’s also organic if you buy organic oils).
- You know exactly what is in your skincare routine: no artificial ingredients, no synthetic fragrances, and no dodgy chemicals.
- The routine has only two simple steps. Couldn’t we all use a time saver?
Does this sound too good to be true? It only gets better!
Cost Savings
- It only costs $11.17 for a six month supply (1 oz of rose hip oil & 4 ounces of sweet almond oil). That’s a $300 annual savings over my previous skincare routine and I like the results MORE!
Oil Cleansing Tips and Tricks
- I have also used avocado oil in place of sweet almond oil in this routine. I honestly can not tell a difference between the effects. Avocado oil, like sweet almond oil, is used to treat eczema, psoriasis, and other skin ailments. It is non greasy, absorbs quickly, and is recommended for sensitive skin. It can be used as a general skin moisturizer. If you can not use sweet almond oil or want to try a different combination, I would start with avocado oil as your base oil.
- It’s going to take a few days (even up to a week) for your skin to adjust to the new routine. Many commercial cleansers strip skin of its natural oils, leaving it tight. Your skin ups oil production to compensate and you get into a vicious cycle of over cleaning then over oil producing.
- When I started this oil cleansing routine I would wash my face at night with my current cleanser (about half the normal amount) before using the oils. I would also cleanse with oil both night and morning (I only used the oils in the morning no cleanser). This twice a day cleaning lasted about two weeks. Now I cleanse with oil at night and simply wipe my face with a warm washcloth in the morning.
- If you wear a lot of eye makeup (especially waterproof mascara) you might want to run a cotton ball with a bit of Sweet Almond Oil (or Avocado Oil) on it over your eyelids and lash area to remove the makeup before starting the oil cleanse each night. This will help remove the mascara and you won’t look like a raccoon or stain all your washcloths with makeup.
- I have normal, combination skin. If you have very oily or acne prone skin you may want to try mixing an oil such as calendula or rosemary with your sweet almond oil in place of rose hip oil. You can learn more about oils that are good for treating acne at the Organic Authority blog. (Again, make sure to patch test any new oils.)
I hope you try oil cleansing if you are dissatisfied with your current beauty routine. It is an easy and affordable DIY. If you do not like the routine you can use the oils for moisturizing your body and you’re only out $11. (I’ve personally wasted a lot more money trying to find great face care products!)
Get More Non-Toxic DIY
Subscribe to my free weekly email to learn more about DIY non-toxic body care.


Mrs Lisa
THANK you.. you explain things so well.
I am Soaper , so use a lot of wonderful oils. in the evening I use my shew butter/ charcoal soap. rinse off & then apply the oil.
I used a bit avocado & a few drops of Jojoba oil, which is SO good for your skin. I spread it on in an upward motion.
I don’t wash it off really,
just use a damp warm cloth to blot it after a couple minutes.
In the morning I just splash with cool water.
love all the info you provide.
just signed up for your emls 🙂
Bren
Thanks, Lisa!
Jessa R
Just found your site through Pinterest and I am really loving all your ideas! I was curious, have you ever made a natural toner to use after the oil cleanse? I know there is a line sold here in Canada from Rocky Mountain Soap Company and they suggest using one of their toners after their oil cleanser, but I just can’t afford their price point (though I DO love their products).
Do you have any thoughts/ideas of how to concoct a natural purifying/calming toner?
Bren
Thanks Jessa! I have not made a toner yet but sometimes use unscented witch hazel, apple cider vinegar or my rose water glycerine spray. Rose water also works well on its own. The witch hazel is for normal skin, the vinegar for more oil skin and the rose water for dry skin. Hope this helps!
Lynda
I just found your site and I am excited to try this oil cleansing method. I have tried so many expensive cleansing products with varied results. I also have Rosacea around my nose which makes it even more difficult to find products that won’t irritate or cause an acne flare. I want something natural and this sounds so easy to do. Thank you!
Bren
Thanks Lynda! I hope it works well for you. I use rose hip oil to soothe my daughter’s eczema, I hope you like it for rosacea.
Sierra
I started out putting coconut oil on my face before I went to bed, but because it is a light moisturizer (I found out later), it didn’t leave my dry skin feeling moisturized. So I decided to try sweet almond oil and I’m VERY pleased with the results! My night time routine consists of washing off makeup with coconut oil while I’m in the shower (which ends raccoon eyes – your idea of using a cotton ball would surely take care of that) and then putting about 5 drops of sweet almond oil in my palm and applying it to my face. I don’t wash my face after like you do during your oil cleansing routine. I just leave the almond oil on and go to bed. I couldn’t believe that my face was staying moisturized ALL day and I don’t even need to reapply more in the morning. Yay, no more dry skin!! 🙂 I’m proud to say I am apart of the Sweet Almond Oil club now! haha
I don’t use face wash anymore and I think I will try using your idea of a drop of tea tree oil next time I get a blemish.
I enjoy your posts and the way you explain things. You know what you’re talking about! Making my own products vs buying chemically-laden items from the store is a lifestyle change and there are a lot of trial-and-errors that come with DIY projects. So I really enjoy hearing of recipes that work well for you so that I don’t have to do so many trail runs 😛
Hope you have a blessed day!
~Sierra
Bren
Thanks Sierra! I will have to try the coconut oil for makeup removal. I generally use almond oil or avocado oil. I agree, I like making my own products vs buying. So glad you found the site!
Kim
Yay! I am looking forward to trying this with my next Amazon order. I want to change up my routine because these days I am reacting to everything and getting eczema on my face. I hope this is a good alternative. I have to go for the avocado due to our family allergy issues! Thanks friend! Kim
Bren
I’m so glad you are going to try it! I use avocado oil on my daughter’s eczema (it gets irritated from swimming). It works well for her. I hope you like it too!
Julie Horihan
Such great tips. I love reading your posts. Keep them coming! I tried the roasted garbanzo beans and LOVED them. I can just hear your voice and see your hands gesturing as I read your posts. 🙂 Thanks for all you do! Julie.
Bren
Thanks, Julie. You are such a benevolent reader. Your comments always bring a smile to my face!