Host a fun Sharpie crafts evening for friends with this easy custom wine tray & glasses tutorial. If you can trace you can make this tray set!
This post is part of a sponsored post-campaign with Pollinate Media Group and Sharpie Paint Marker, all my opinions are my own. This post uses affiliate links. Read more in Policies & Disclosures.

I belong to a book club that my husband affectionately refers to as “the wine of the month club that sometimes reads books.” While we do actually read books our monthly meetings are a lot more about friendship and fun than literary masterpieces.
I’m perfectly okay with that!! Everyone needs to relax with friends once in a while.
The Pinterest Party
Do you need a little girlfriend time? I’m currently obsessed with the idea of a Pinterest craft party where friends gather for an evening of craft projects found on (you guessed it) –> Pinterest.
That party theme has my name written all over it.
- I love crafts
- I love spending time with friends
- I love hosting parties
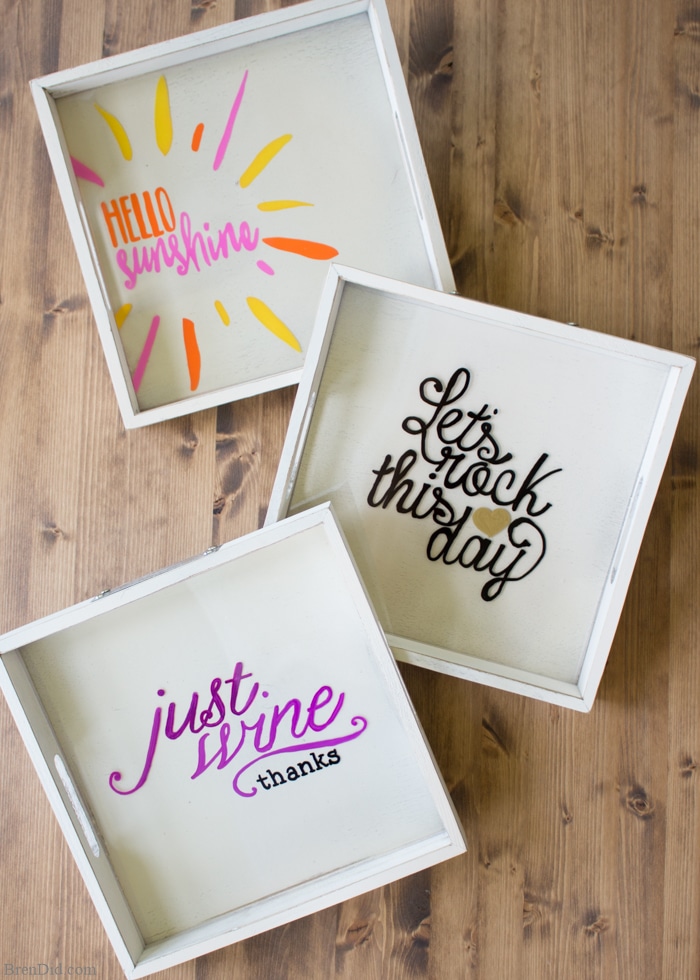
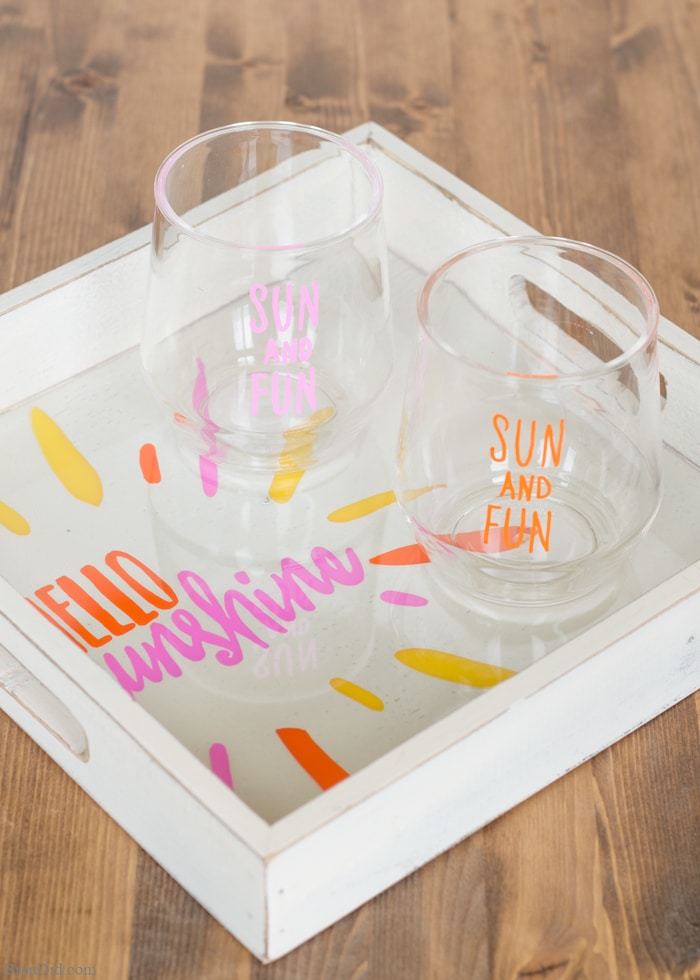
Sharpie Wine Tray and Glass Set
Some of my friends are a little reluctant to get involved in a craft party because of their lack of artistic ability. To make the evening a total success I’ll be gathering them for a Sharpie Crafts Party where we make this fun wine tray and glasses set.
I love this project because:
- It is simple to make, it requires ZERO artistic skill. EVERYONE can do it!
- The supplies are affordable; the tray with four wine glasses costs about $20.
- Oil-based Sharpie paint pens dry lickety-split so you can have the whole project completed in about 30 minutes!
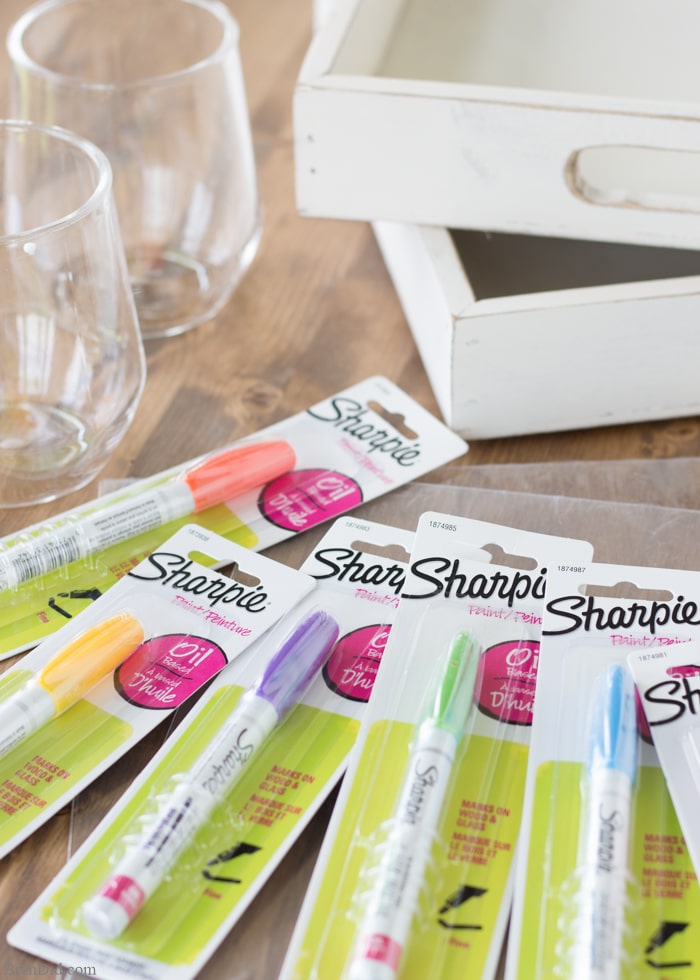
Supplies
- Sharpie Oil-Based Paint Markers (fine tip)
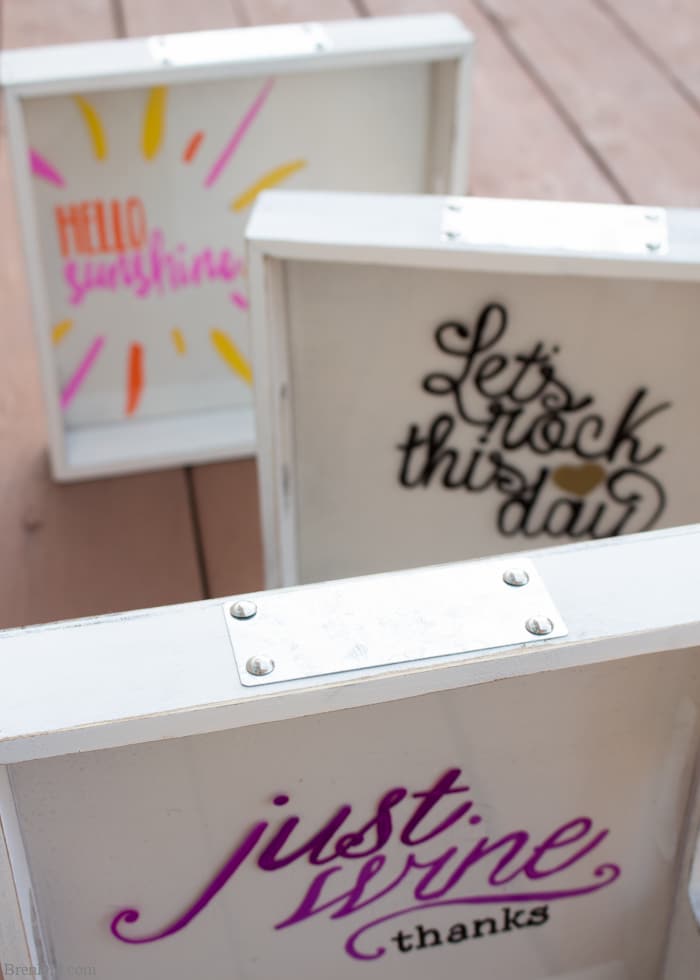
- Wooden Tray (at least 10 x 10), check out these options: 10×12 Tray or 11×14 Tray
- Plexiglass, 10 x 14 sheet
- Melamine Stemless Wine Glasses
- Printable PDF pattern
Total cost = approx $22.00 (and the paint pen will still have lots craft power left)
Directions
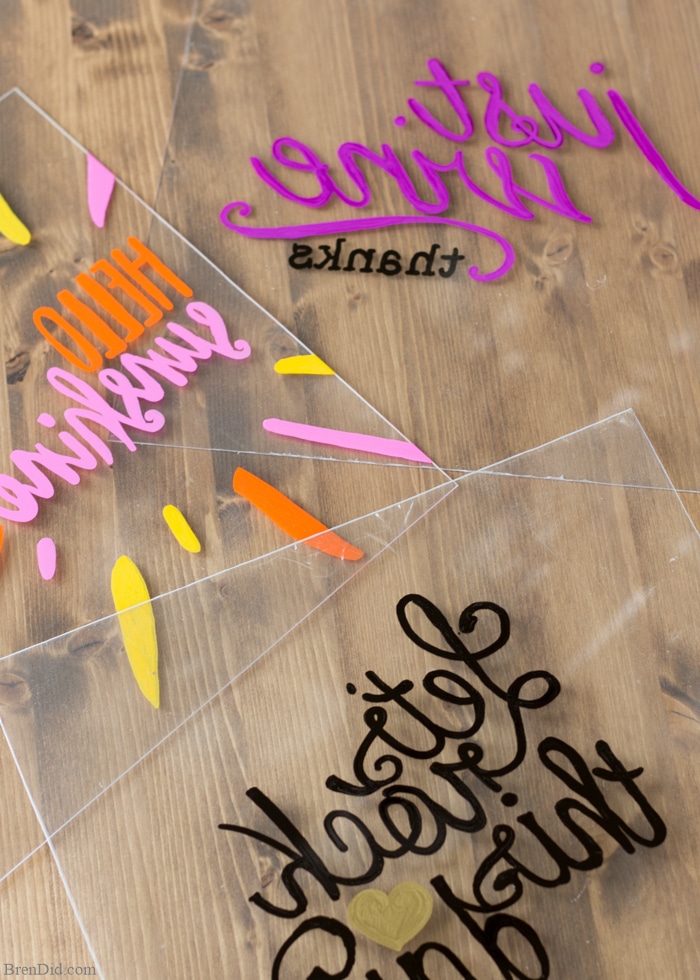
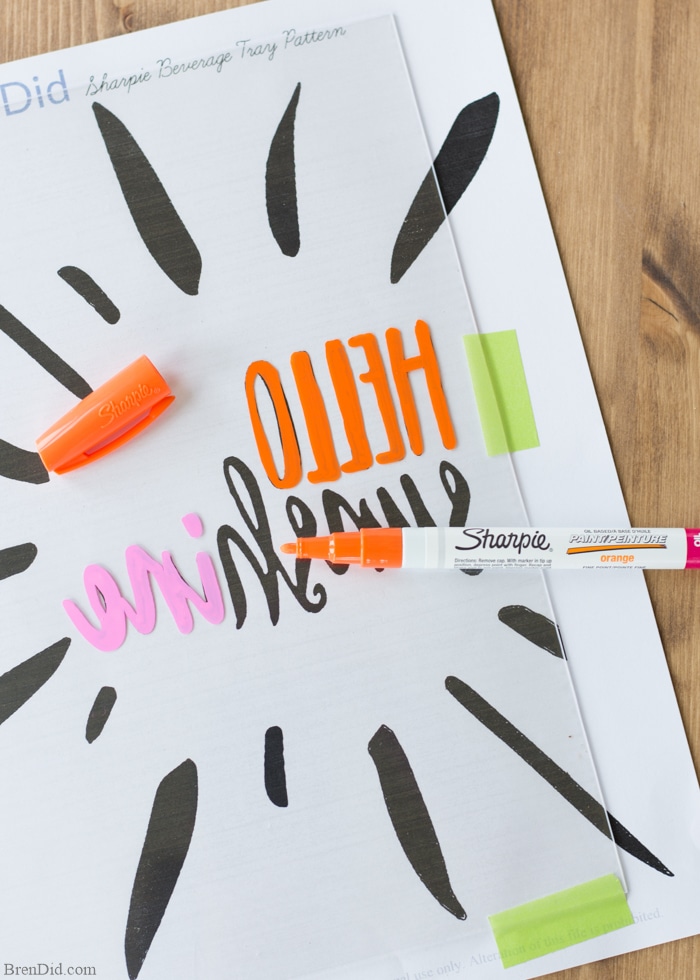
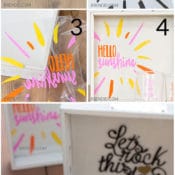
- Print out the PDF pattern and pick a design. (Note: the patterns are backward, this is necessary)
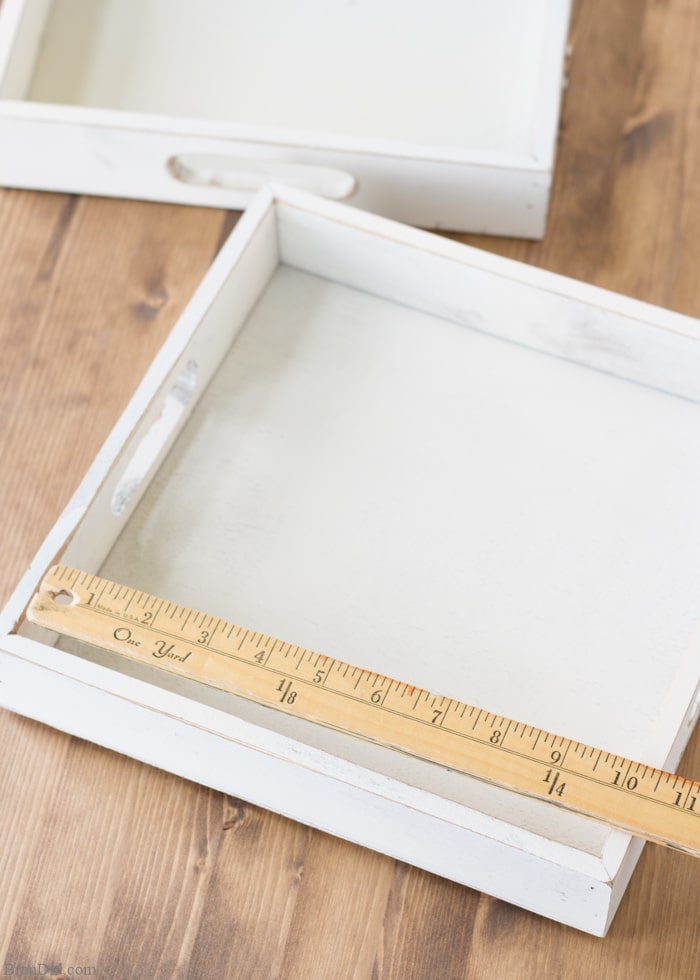
- Wipe tray with a damp rag to remove all dust. Measure the inside dimension of the tray, this one is 10×10.
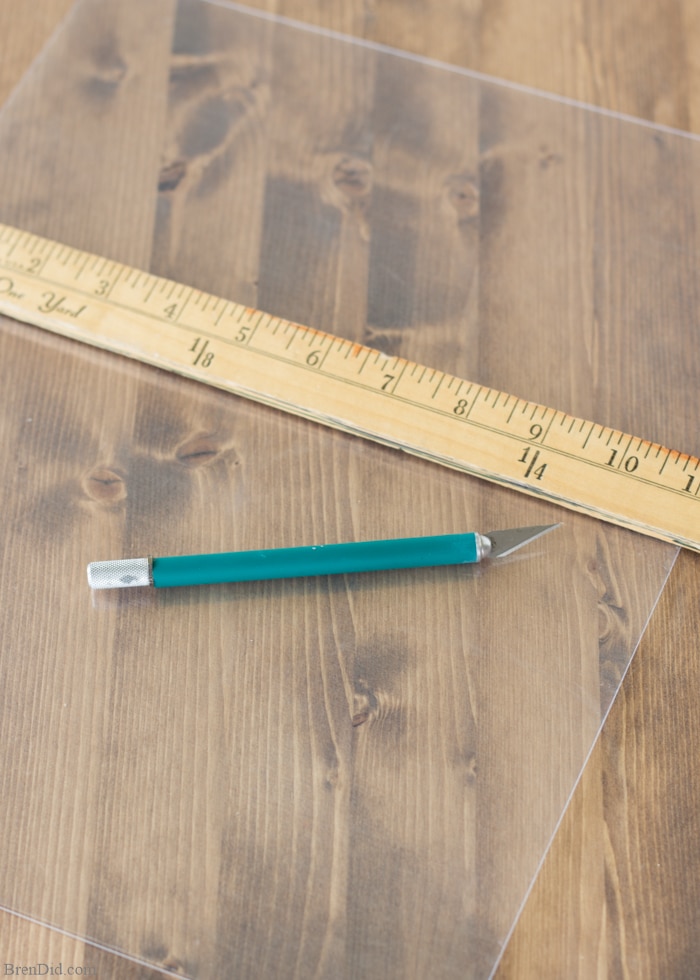
- Carefully measure your Plexiglas, mark the lines with a black Sharpie marker. DO not remove the protective coating from the Plexiglas, it protects it from scratches.
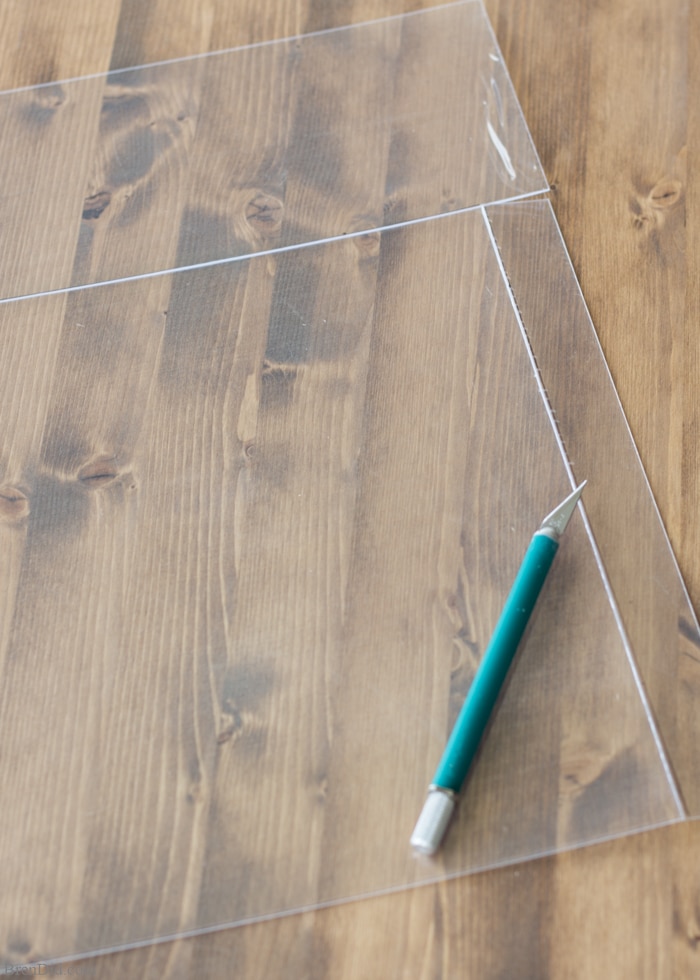
- Score the Plexiglas along the line several times use your ruler as a guide. (Note: Push lightly on the knife; you are trying to make a groove not cut all the way through the Plexiglas.) Turn the Plexiglas over and bend upward near the score line, the Plexiglas with snap along the score line.
- Check to make sure the Plexiglas fits snugly in the tray, do not force it in. Cut a bit more off if necessary. (Note: If you have to make a tiny cut, score the Plexiglas several times and then use a pair of pliars to “nip” off tiny pieces of the edge)
- Lay the pattern on your table and place the Plexiglas on top. Remove the protective plastic coating from the side facing up. Secure Plexiglas to design with removable masking tape.
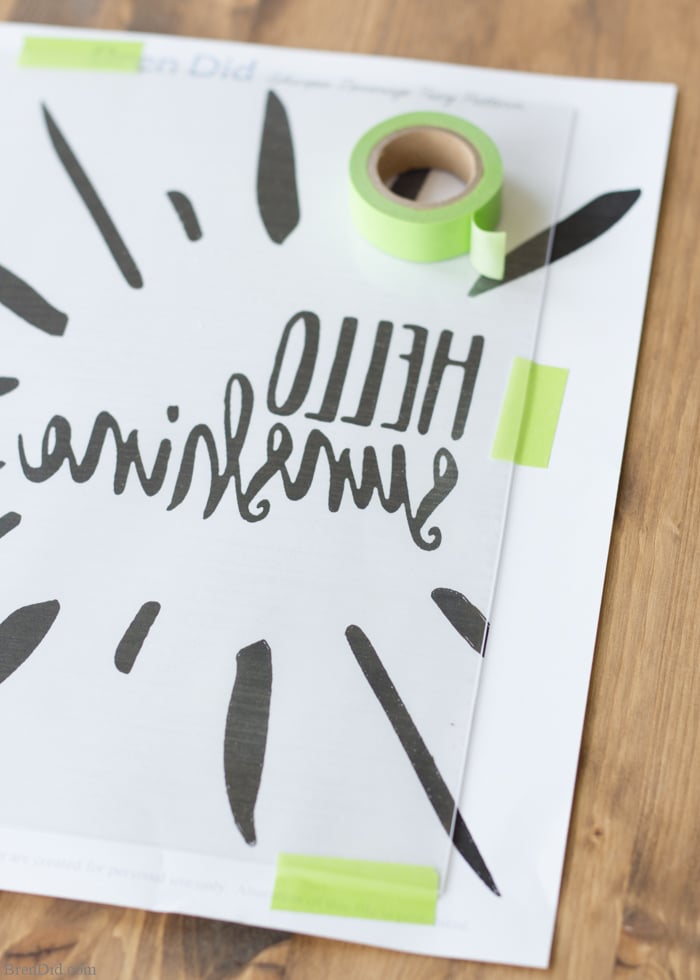
- Prepare your Sharpie oil-based paint markers according to package directions. (Open, shake, get paint flowing). Carefully trace the design onto the Plexiglas. (Note: if you have never used Sharpie oil-based paint markers you should practice a few strokes on a piece of cardboard before starting.) Allow the paint to dry for about 10 minutes, carefully check from the front side to see if any areas need touch up paint.
- Allow paint to dry completely (this took about 20-30 minutes for my trays), remove protective film from front of Plexiglas, and place into the tray painted side down.
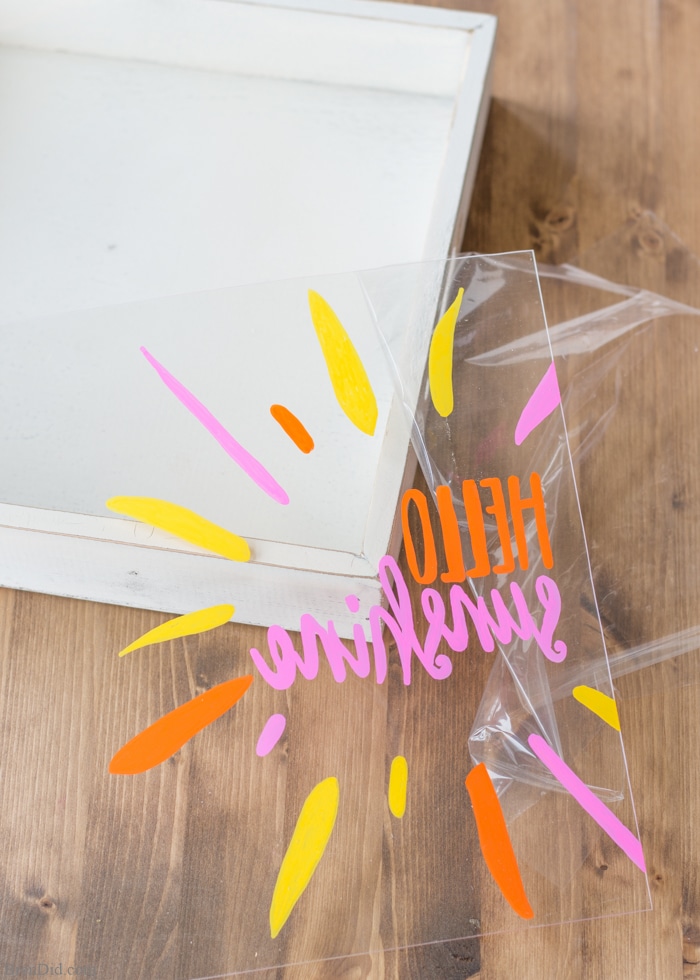
- To make wine glasses: cut out desired pattern and tape inside a glass. Trace with Sharpie oil-based paint markers and allow to dry.
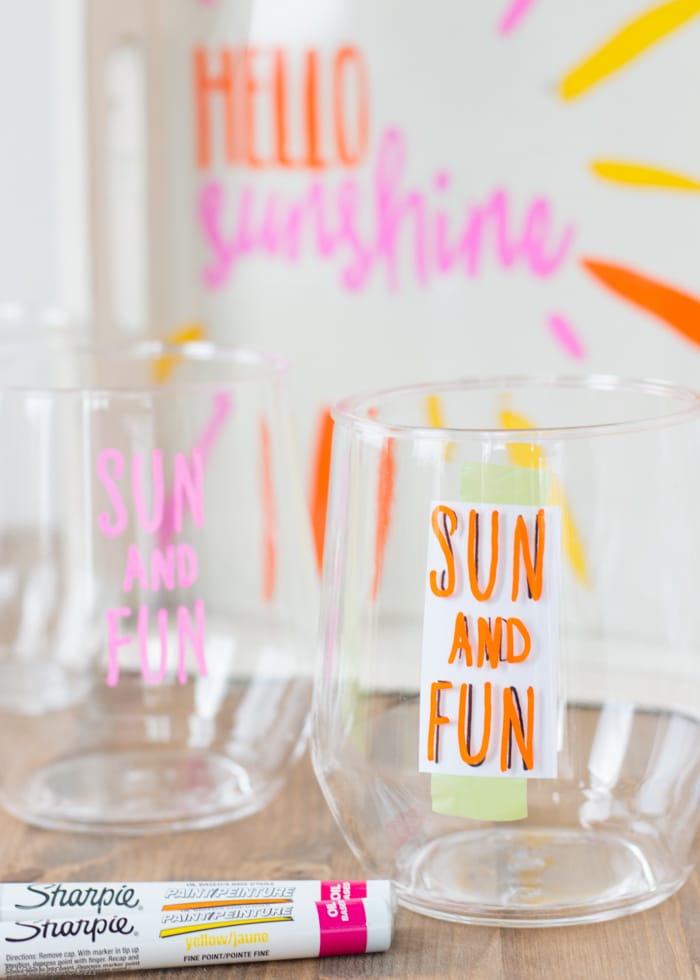
Care tip: Your tray should be wiped with a damp rag to keep it clean, the glasses should be hand washed.
Plan a Sharpie Crafts Party
Get the pens, call your girls, and get crafting! It’s avfun girls night in with friends. Making crafts with Sharpie permanent oil-based paint markers makes the night SOOOOOO easy! Why?
- Markers = Less Craft Supplies –> The markers are reasonably priced and there is no need to buy seperate brushes, stencils, or smelly paint remover for cleanup.
- Lots of Uses –> There are lots of great Shapie marker colors available at Michaels. They are bright and glossy on virtuall any surface: metal, pottery, wood, rubber, glass, plastic, stone,etc!
- They Work Great –> The oil based paint is quick drying so your guests can take thier projects home with no fear of smears! Plus, the paint is resistant to water, fading, and abrasion. Since the markers are AP Certified and Xylene free there are no smelly fumes.
More Sharpie Crafts
Sharpie oil-based paint markers can be used for any project. Add a few more easy Sharpie crafts to the party to make it even more fun. Check out these easy tutorials:
Easy Teacher Appreciation Flower Pails
I hope you make a wine tray and glass set for yourself and also a try hosting a Sharpie crafts party. If you like my easy craft tutorials be sure to sign up for my free weekly newsletter.

Melissa
This is so CUTE! I have always been hesitant to do any “sharpie crafts” for fear it would not stick but this looks so fun. And I love those designs!
Bren
Thanks Melissa! You are so sweet to comment.
Clarissa
These are adorable – I love Sharpie Paint Pens!!
-Clarissa @ The View From Here
Bren
Thanks Clarissa! I’m flattered! 🙂