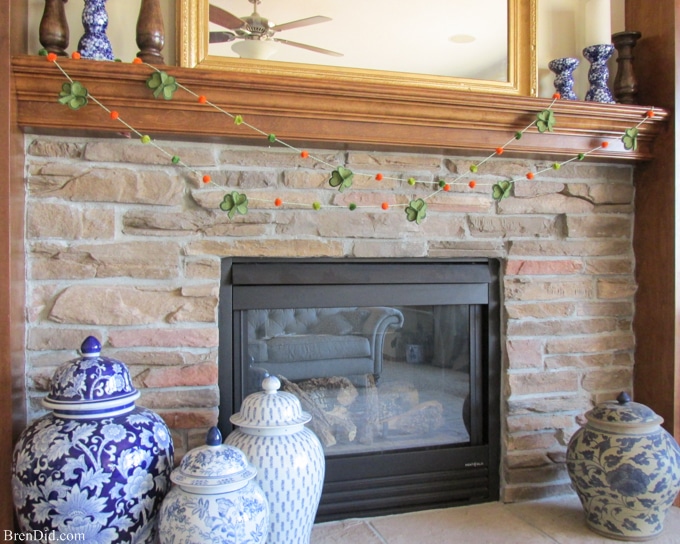
This fun St. Patrick’s Day Shamrock garland uses craft felt, baker’s twine, and pre-made pom poms. It adds a touch of lucky Irish spirit to any home and can be made in less than an hour.
Easy Holiday Decor
I love dressing up my home for seasonal holidays, but I hate the hassle of redecorating an entire room. This is why I love festive banners and garlands. A small garland can easily be added to your everyday décor and just as easily removed a few days later without much fuss.
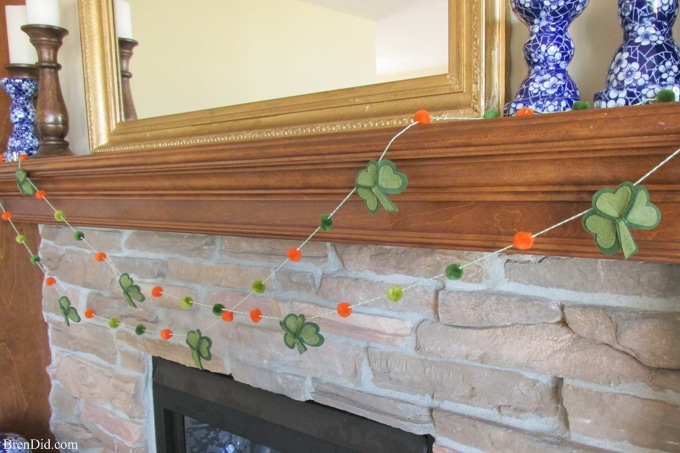
Are you a St. Patrick’s Day lover? This year I decided to add a simple shamrock garland to our mantle to call special attention to St. Patrick’s Day.
How to Make a St. Patrick’s Day Shamrock Garland
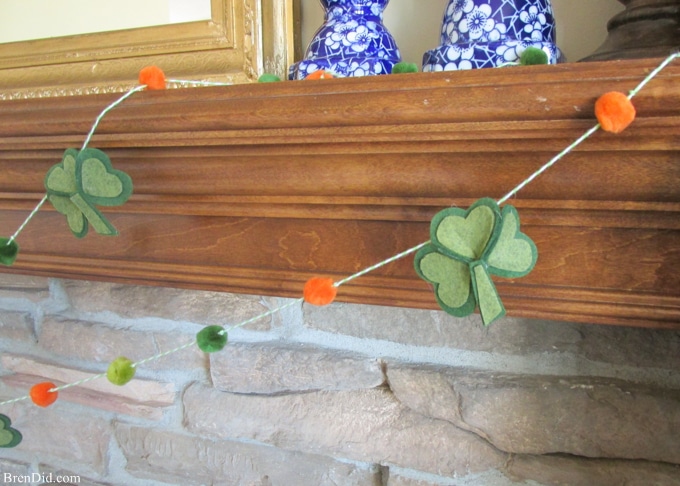
The garland is made from wool blend felt which is higher quality than standard craft felt. You can buy it on the bolt at most fabric stores. Craft felt will work perfectly well for this project, but I liked the richer colors of the wool blend felt.
The pom-poms for the project were purchased from the kids arts and crafts section of my local craft store. The pack comes with two greens, gold, orange, brown and red. I used the green and orange pom-poms and saved the rest for my fall projects.
I used green and white bakers twine to spring the pom-poms and shamrocks. You can use any sturdy thread or twine. Jute cord would also be adorable with the green and orange colors.
Supplies
- Light green felt, 2 – 8×10 sheets
- Dark green felt, 2 – 8×10 sheets
- 40 -1/2 inch pom-poms (green, light green and orange)
- Hot Glue
- 11-12 feet of twine
- Free printable pattern
Directions
- Download and print that free printable pattern.
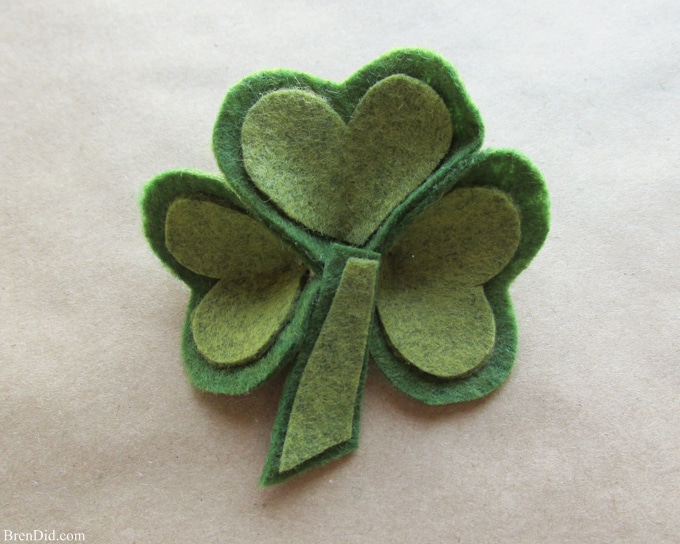
- Trace the light green hearts and stems.

- Trace the dark green leaves and stems.

- Cut out all the shapes.

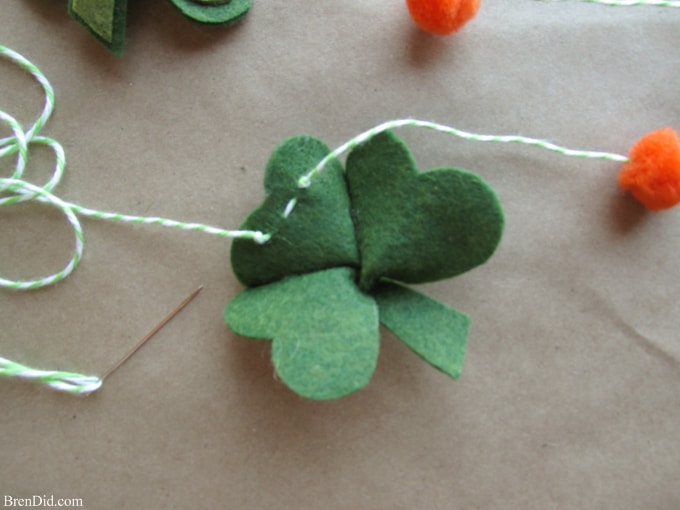
- Glue the light green pieces onto the dark green pieces.

- Add a drop of glue to the center of the dark green leaf edge and pinch together to allow the glue to dry.

- Glue three leaves together along the outer edge.

- Add a drop of glue to the top back of the stem and attach to the center top of the shamrock.
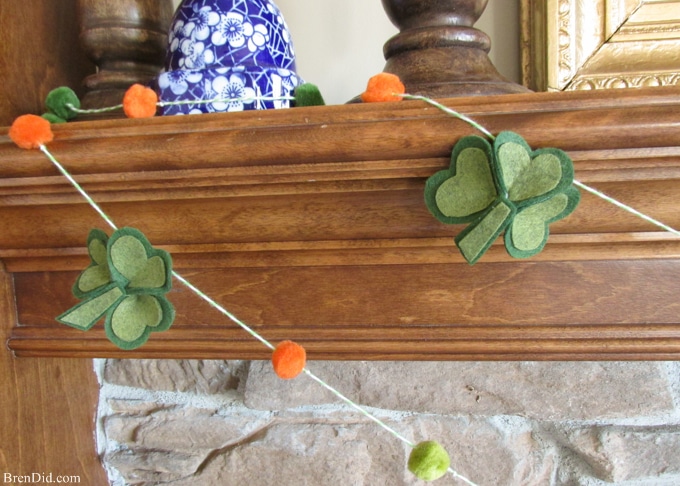
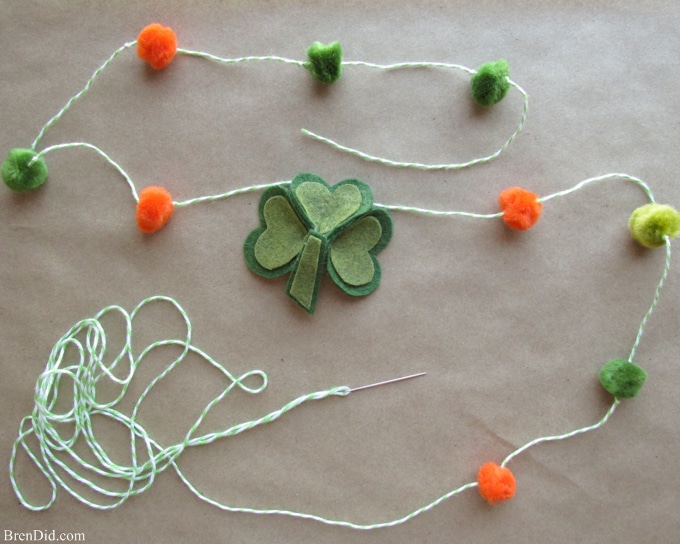
- String the pom-poms 3 inches apart. Knock the cord on either side of the pom pom to keep them from sliding.

- After four pom-poms have been added to the garland, make a knot (3 inches from the last pom-pom) then string on a shamrock.
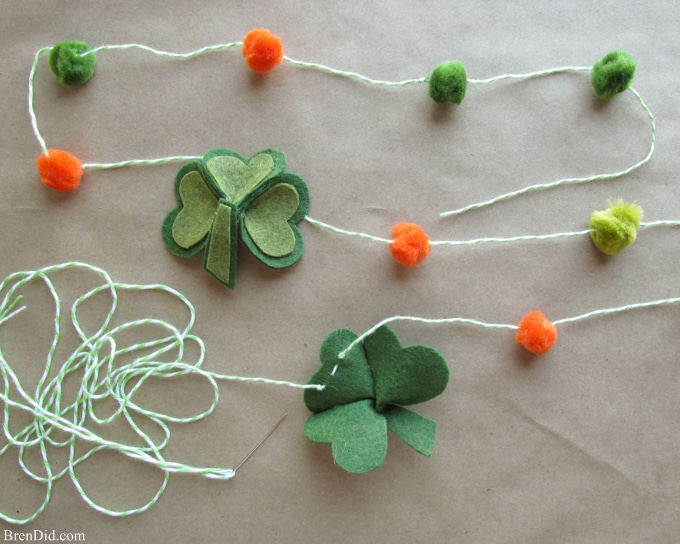
- Add a small knot after the shamrock then move ahead three inches and add the next pom pom.
- Continue the pattern (four pom-poms, shamrock, four pom-poms) until you run out of shamrocks. Finish with four pom-poms.
Enjoy your shamrock garland!
Love my easy holiday garlands? Sign up for my free newsletter below and never miss a thing!


Leave a Reply