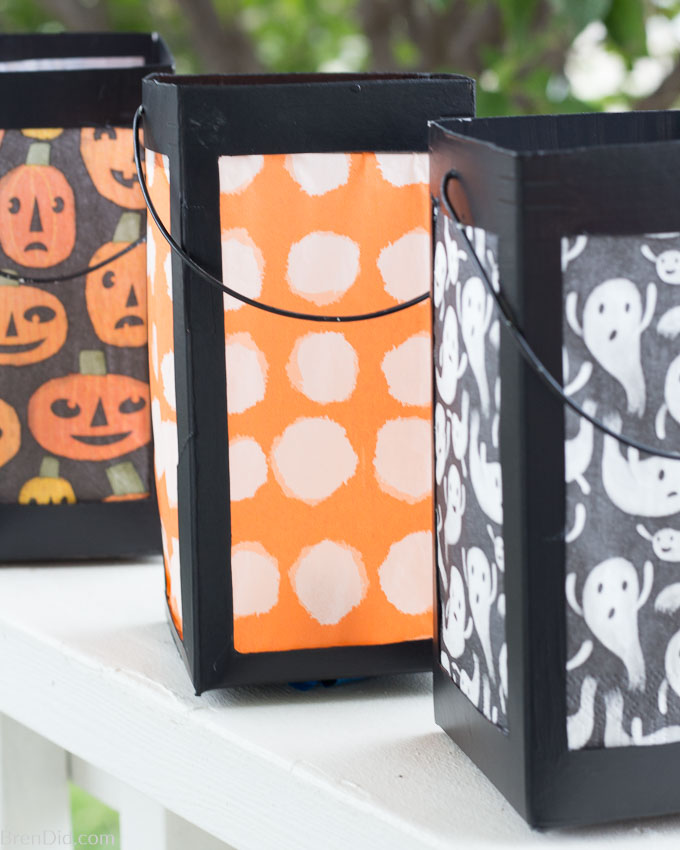
Learn how to make simple paper lanterns from a milk carton with this easy DIY tutorial. Use basic crafts supplies (milk carton, tissue paper, glue, and scissors) to make these Japanese inspired Halloween paper lanterns.
 This post contains affiliate links. They don’t cost you a thing, but help us bring you creative projects. Read more at Policies & Disclosures.
Our family lived in Yokosuka, Japan for several years when our children were in lower elementary school. (My husband and I also lived in Japan a few years earlier when our son was an infant.) I was excited to move back and share my love of Japanese culture once the whole family was old enough to enjoy it.
I love visiting Japanese temples, shrines, and historic sites… but my kids get a little sick of the “boring stuff” after a long day of touring. Luckily, the matsuri (festivals) held throughout the year are always a fun adventure for both kids and adults.
Japanese Lantern Festivals
Japanese festival are legendary! They celebrate everything from seasons (think spring cherry blossoms and winter snow sculptures) to ancestral spirits and the movement of the stars.
Our favorite matsuri are the small summer events held along city streets, in parks, and on shrine or temple grounds. These festivals are hot and muggy but packed with tasty treats and fun games for kids.
I love heading to the festivals late in the day when the sun is beginning to set and the heat is a bit less intense. It’s the perfect time to enjoy the spectacular illuminations (the Japanese phrase for outdoor lanterns or lights).
Each summer the merchants in our town would close the side street and line the sidewalks with homemade paper lanterns for a small weekend celebration. The temporary lights are made from a thin wooden or cardboard frame that is covered in paper and decorated with colorful designs.
The simple drawings on the paper lanterns are usually created by school children from the area and lit with candles to make the lanterns softly glow.
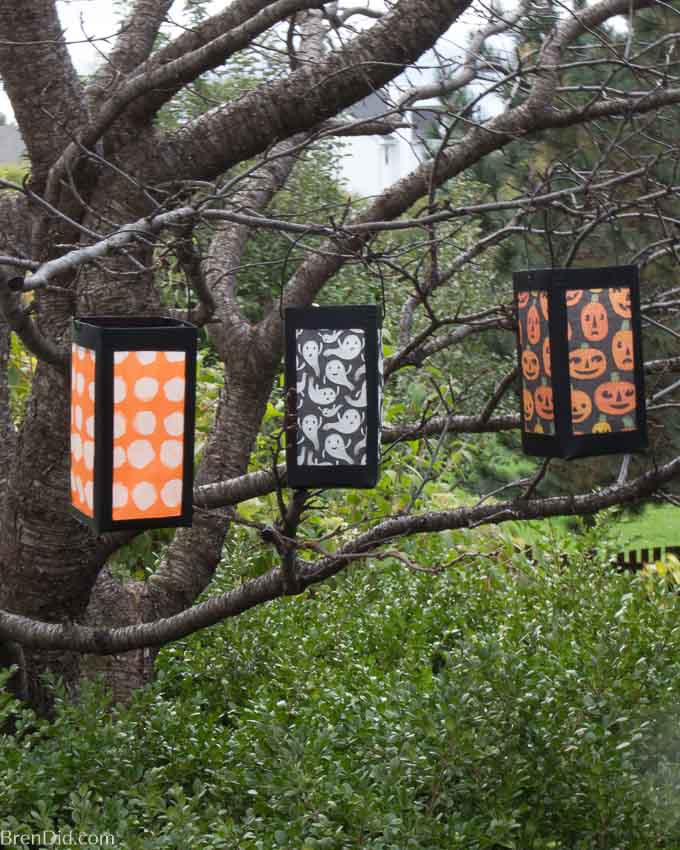
It’s a gorgeous way to light up summer festivities… and these simple paper lanterns are perfect for your celebrations too!
Types of Paper Lanterns in Japan
There are many types of paper lanterns and lantern festivals in Japan.
- Toro lantern festivals are a summer tradition in many Japanese cities. Square floating paper lanterns are decorated, lit with candles, and released down a river. This ritual is known as toro nagashi (sometimes spelled tourou nagashi), meaning flowing lanterns. It symbolizes the souls of the deceased being guided toward peace.
- Andon are another popular type of Japanese lantern. Andon are rectangular lamps with a bamboo or wood frame lined with paper. The paper protects the light source from the wind and also diffuses the light which makes the lantern glow. These lanterns are often used as indoor lighting or under the eaves of a merchant’s shop.
- Chōchin lanterns are round or oval shaped lanterns made of paper stretched over delicate bamboo ribs. This well know lantern design came to Japan from China. Chōchin often hang outside restaurants or shops as advertisement, at shrines and temples to display donors’ names, or as decorations for festivals and events.
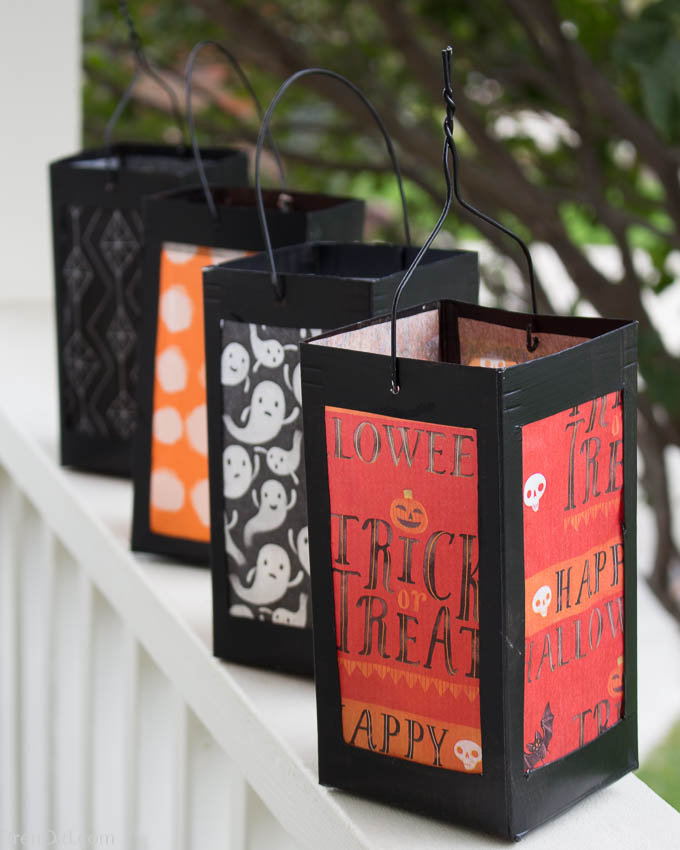
Milk Carton Lantern Craft
This DIY tutorial makes paper lanterns that resemble Japanese toro or andon lanterns but have frames made from milk cartons instead of bamboo or wood. The milk carton provides the structure of the lantern and the light is diffused by colorful tissue paper.
How to Decorate Paper Lanterns
No tissue paper, no problem! You can use any paper to make these lanterns (think printed paper napkins, wax paper, white copy paper, parchment paper, or vellum). Add designs to plain paper with permanent markers or crayons before attaching it to the milk carton
Milk Carton Lantern Instructions
Follow these simple instructions to make a milk carton lantern.
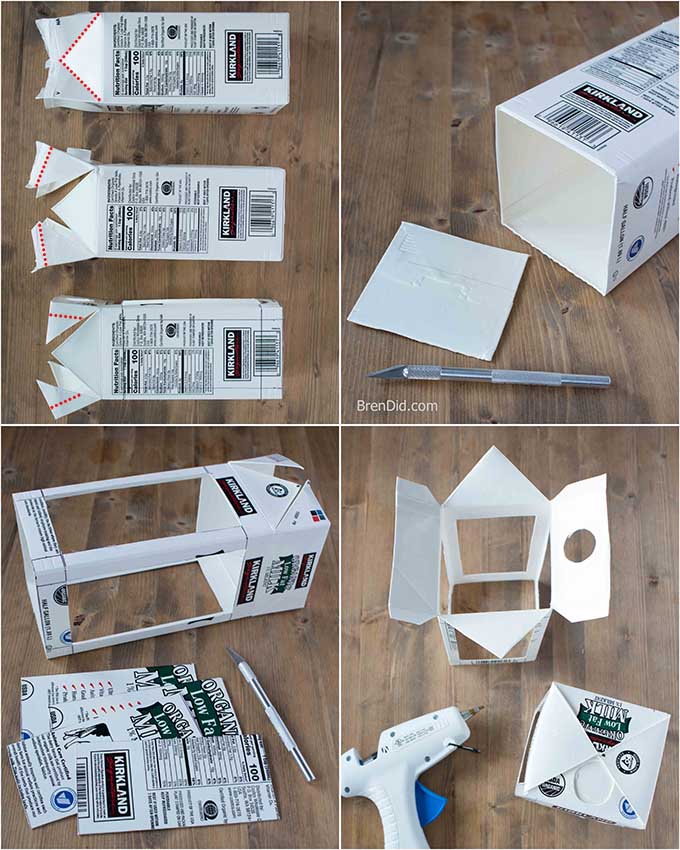
- Rinse the milk carton clean and allow it to dry completely. Open the carton top and trim open. (See red dotted lines in diagram below.) Cut off screw top (if carton has one).
- Next, cut off the bottom of the milk carton. (Use a box cutter or X-acto knife.)
- Measure and cut a rectangle opening on each side of the carton leaving a narrow frame. (The lanterns should have a ½ inch frame on each side and 1 inch frame on the top and bottom.)
- Glue the new bottom of the lantern shut with a hot glue gun. Use a scrap of the milk carton to cover the screw top (if needed).
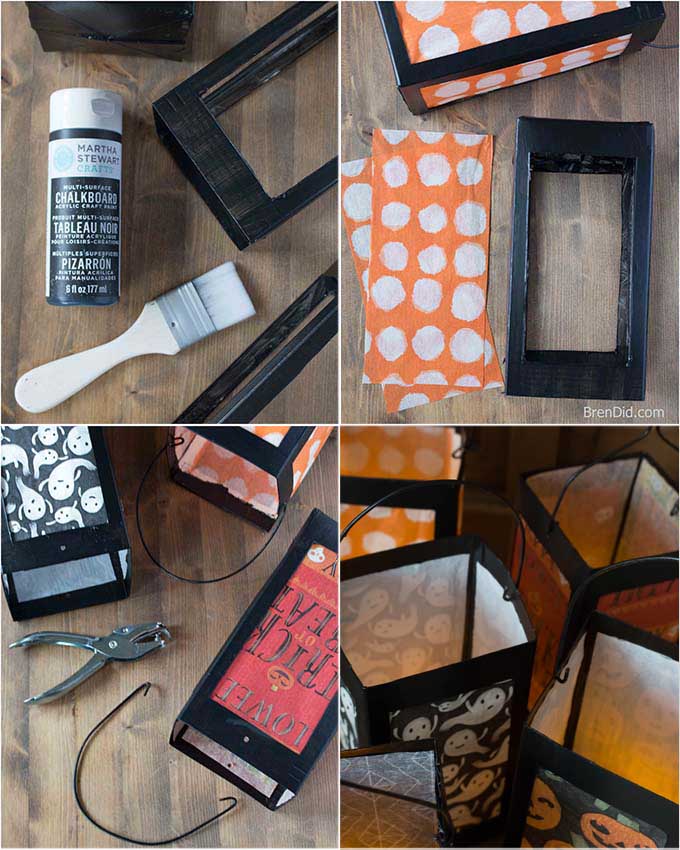
- Paint the inside and outside of the milk carton black and allow to dry. (Use several light coats of chalkboard paint, spray paint, or acrylic paint.)
- Cut pieces of tissue paper that are ½ inch wider and taller than the side openings. Spread a thin layer of glue around the inside of the side milk carton openings. Lightly press the paper into the glue inside the lantern with the design faces out. Allow glue to dry.
- How to hang paper lanterns: Use a small hole punch to make holes on two opposite sides on the lantern. Attach wire handle to milk carton. (See directions for wire coat hanger handle below.)
- Place a small battery-operated candle into the bottom of the lantern to illuminate. (Do not use a real flame for safety.)
How to Make a Lantern Handle from a Coat Hanger
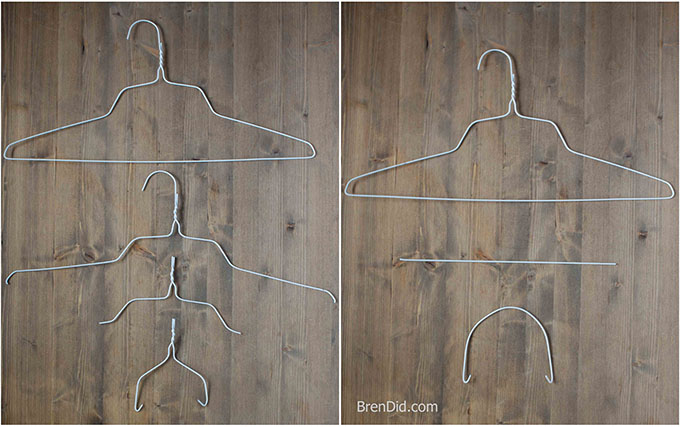
Use a wire coat hanger to make a lantern handle. You can make two (2) handles per hanger.
Handle 1
- Cut the bottom of the hanger off using wire cutting pliers, set aside.
- Snip off the top rounded portion of the hanger hook to the twist. Cut sides to shorten.
- Use needle nose pliers to twist the ends inward into a hook.
Handle 2
- Cut the bottom of the hanger off using wire cutting pliars, set top portion aside.
- Shape wire into a rounded hanger. Wrap around a large can or vase to make shaping easier.
- Use needle nose pliers to twist the ends inward into a hook.
You may paint the handles with black spray paint before attaching, if desired.
Tips for Making Perfect Milk Carton Lanterns
These simple tips will help you make perfect milk carton lanterns:
- Practice makes perfect! Have a few extra milk cartons ready to practice your cutting technique.
- Use a box cutter or X-acto knife to cut an “X” shape in the center of each rectangle opening then finish cutting the window out with a small pair of scissors.
- Apply several light coats of paint for a smooth finish. A thick coat of paint can drip or run.
- Use colorful tissue paper with dark and light areas in the patterns. These variations allows the light to shine through the design. (I bought mine at Target.)
- For best results use hot glue to fasten the lantern bottom shut. Hot glue holds tightly and dries in seconds. (If making the lanterns with children have an adult use the glue gun.)
- Use white school glue to attach the paper to the milk carton frame. It is easy to spread with your finger tip, washes off your hands easily, and dries clear on the lantern.
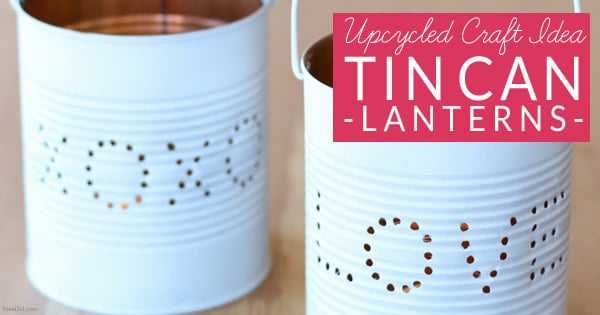
More Recycled Lanterns
Check out my upcycled tin can lanterns for another fun lantern project!
I hope you enjoy making these simple paper lanterns and learning a bit about Japanese culture. Try making this easy Japanese corn soup recipe for a taste of Japan that kids love!
Like my easy crafts? Sign up for my newsletter below and never miss a thing!


Lulu
What do you mean when you say “glue the new bottom of the lantern shut?” What’s are you using for the new bottom? Why not just use the bottom as is—what’s the point of cutting it off?
Bren
In the photos above you can see the top being turned into the bottom once the milk carton is cut into a lantern shape. It is easier to cut the sides with no bottom then re glue.
Carol B
Thanks Bren–I’ve used several of your recipes and found them to be delicious and easy to follow. I love these lanterns for Halloween. Thanks so much for sharing all your wonderful ideas.
Bren
Thanks Carol! You are too sweet!