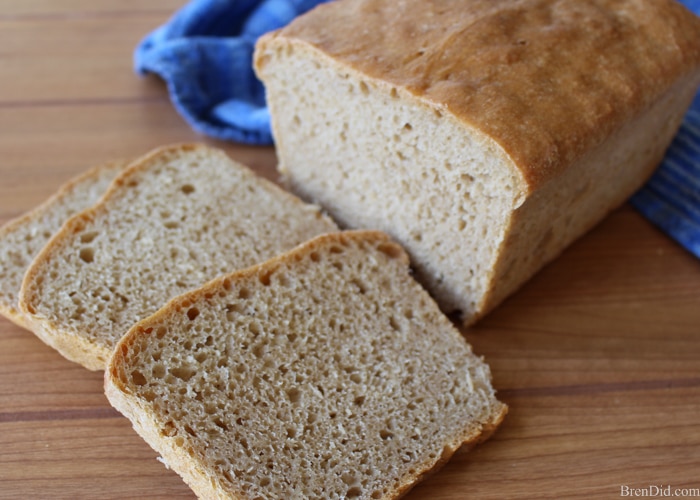
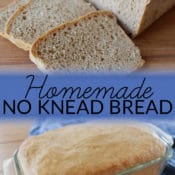
Homemade No Knead Bread requires neither time nor expertise! Simply stir together the ingredients, let the yeast work, and enjoy the delicious results. Get the easy recipe today.
Fresh baked bread is a wonderful treat for all the senses.
- the whole house smells delicious as the loaf bakes,
- a beautifully browned loaf is pleasing to see,
- the first warm and crusty slice, smeared with jam, is taste bud perfection, and
- you will relish hearing all the oooohs and ahhhhs that fresh bread earns
HOWEVER
Homemade bread recipes usually require a lot of hands on time for the baker. This Homemade No Knead Bread recipe requires neither time nor expertise! You simply stir together a few ingredients, let the yeast do its work, and enjoy the delicious results.
Homemade No Knead Bread
I love baking this bread during the school year for tasty school lunches. PB &J is elevated to a whole new entree when made on fresh baked bread! Ham and swiss never had such a tasty wrapper! We also love a simple dinner of freshly baked bread, fruit, vegetables, and a bit of cheese. So simple and yet so yummy!
Even if you have NEVER baked I hope you try making Homemade No Knead Bread! It is a virtually foolproof way to enjoy delicious home baked bread.
Print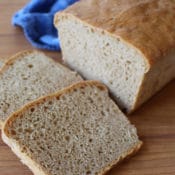
Healthy Recipe Idea: Homemade No Knead Bread
- Prep Time: 900 minutes
- Cook Time: 40 minutes
- Total Time: 940 minutes
- Yield: 1 loaf 1x
- Category: Bread
- Cuisine: American
Description
Homemade No Knead Bread requires neither time nor expertise! Simply stir together the ingredients, let the yeast work, and enjoy the delicious results.
Ingredients
- 1 1/2 cup unbleached white flour
- 1 1/2 cup whole wheat white flour
- 1/4 + 1/8 t tsp dry yeast
- 1 t ¼ salt
- 1 3/4 c warm water (110-120° F)
Instructions
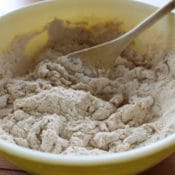
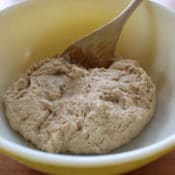
- Place the flour, yeast and salt in a large bowl, stir gently to combine.

- Add water all at once and stir to form a wet dough. Make sure all flour is incorporated.
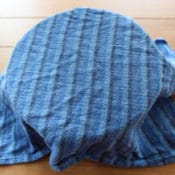
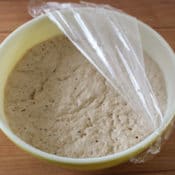
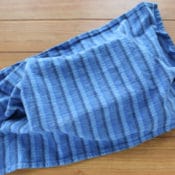
- Cover bowl tightly with plastic wrap and place a clean kitchen towel over it.
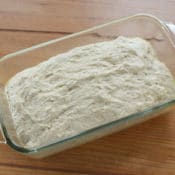
- Let the dough rest for 12 to 18 hours. (i.e. 7:00 am and bake it at 10 pm). Remove the towel and the plastic wrap. The dough will have risen and will be speckled with bubbles.
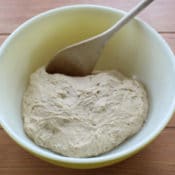
- Stir the dough until it deflates and detaches from the sides of the bowl.
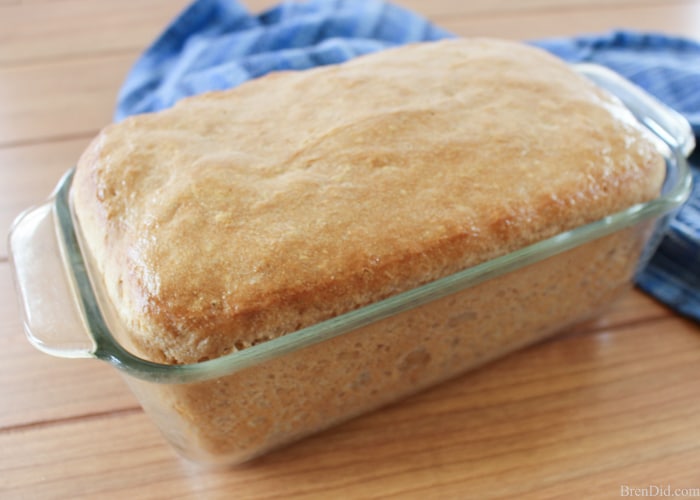
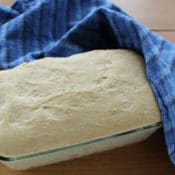
- Pour the dough into a well greased bread pan and spread or pat into a loaf shape.
- Cover with a clean kitchen towel (you can use the one you used in step 3) and allow to rise for 2-3 hours.
- Remove towel.
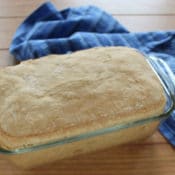
- Preheat your oven to 375 degrees, place bead in center of the oven and bake for 35-40 minutes. The loaf will sound hollow when lightly thumped.
- Remove from oven and brush with butter or coconut oil (about 1/8 tsp). Cool to room temperature before slicing.
Nutrition
- Serving Size: 7 people
- Calories: 195

Like my easy recipes? Sign up for my free newsletter and never miss a thing!

Cat
Could I possibly add shredded cheese and herbs to this before I put it into a pan, would adding something as dense as cheese change the quality and structure of the bread? Could I possibly use a round cake pan instead? Should I add the herbs when making the dough?
Howard
Bren, I will be making this within the next few days. If i wanted to add some herbs to the dough, would I add them with the dry ingredients?
Bren
Yes, I would add the with the dry ingredients. Hope it turns out great!
Howard
I made the bread with a few tweaks. I added 3 tablespoons of vital wheat gluten and 1 1/2 teaspoons of dried thyme. I also used steam as someone referenced previously. Delicious!!!
Stephanie
Easy homemade bread is right up my alley!! Yummy!!
Bren
It’s fun to make with kids.
yagishnee
hi, I recently found your website and will be making the bread today. I always put a baking pan filled with hot water at the bottom of my oven when baking bread & cinnabons. this keeps the dough soft.
Bren
Excellent idea! I’ve never tried that method with bread but have used it with cheesecake. I will try it the next time I make bread!
Phuong
Dear Bren, I like your blog so much! May I ask how long this bread lasts for on countertop versus in fridge?
Bren
It will last for about a week on the countertop of a kitchen. Thanks for visiting!
Marie
I am very glad to see that it worked for some but unfortunately, not for me. Nothing have changed since 7:00 this morning. I veryfied if my ingredients were the same, the yeast and everything. I followed but no success….
Bren
Marie, I’m so sorry you haven’t seen any changes. I let my dough rest for 12 to 18 hours in a warm place. Did you test your water temperature? If you did you might want to proof some of your yeast to make sure it is active before using it in another recipe.
Marie
I decided to let go and 33hours later it rose about half of the bowl. I intend to persue, bake it and see, may be I’ll try a bite. The expiring date on the teast envelope is June 2016… I’ll let you know and I will try the recipe again!
Lavenderlovelife.uk
If the yeast has been opened, its proofing properties diminishes.
ashleigh
I’ve never made bread before, but this looks like something I could possibly accomplish! 🙂 Cant wait to try! <3
Bren
Ashleigh, I hope you try the recipe it is very easy! Let me know how it turns out!
threekidsandafish
Another great recipe! I would love for you to share this sweet creation over at my link party Making Memories Mondays going on now! 🙂
Cathy
Bren
Thanks Cathy! You’re too kind!
Sami T.
How ‘hard’ is the crust when it’s done? That seems to be one of the biggest problems with homemade bread for my husband: the crust is so hard he can’t really enjoy it as a sandwich.
Bren
Sami, it has a denser crust than store bought bread but is still quite soft. My kiddo with braces has no complaints! Make sure you brush it with the butter immediately after baking. This keeps the crust soft.
Tracey
Nicely done…. maybe put this together tonight to bake tomorrow! 🙂
Bren
Thanks Tracey! Let me know how it turns out!